Hi folk! In Part 1, I explained how to install, run SonarQube and create a custom Quality Profile. In this part, I will try to explain how to use created custom Quality Profile for our Android Project and even how to make it easier.
The only thing we need to do, to be able to analysis our code, is as simple as below snippet:
I have only used Java Analyzer but you can also add other properties as you wish. You can also have a look on my Nanodegree project. After syncing project, we now are able to run SonarQube for our project and for that we simply run below command in terminal under the project’s path. Since we choose our custom quality profile as default, the result will be tied with that rules.
./gradlew sonarqube
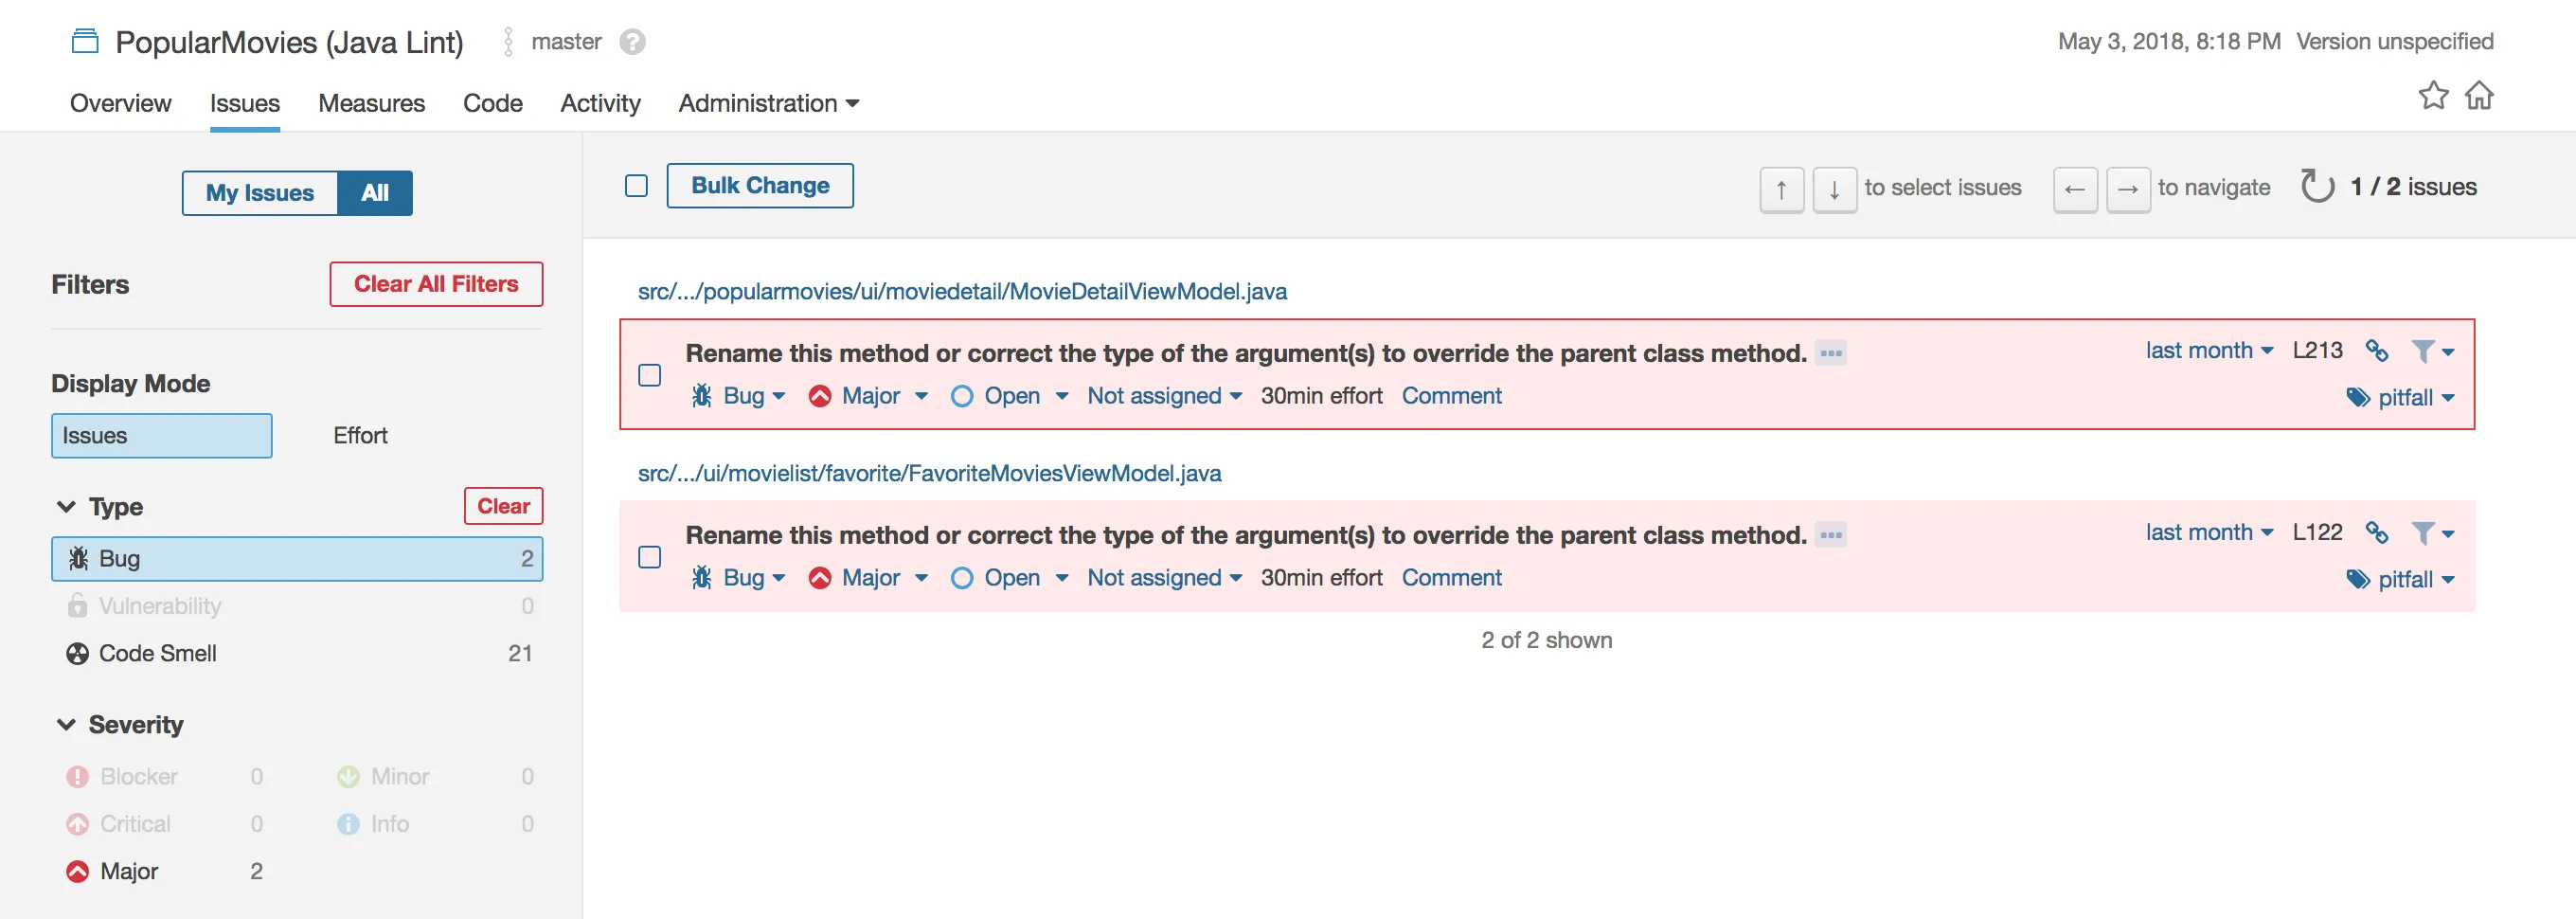
After build become successful, we can examine our project’s analysis results:

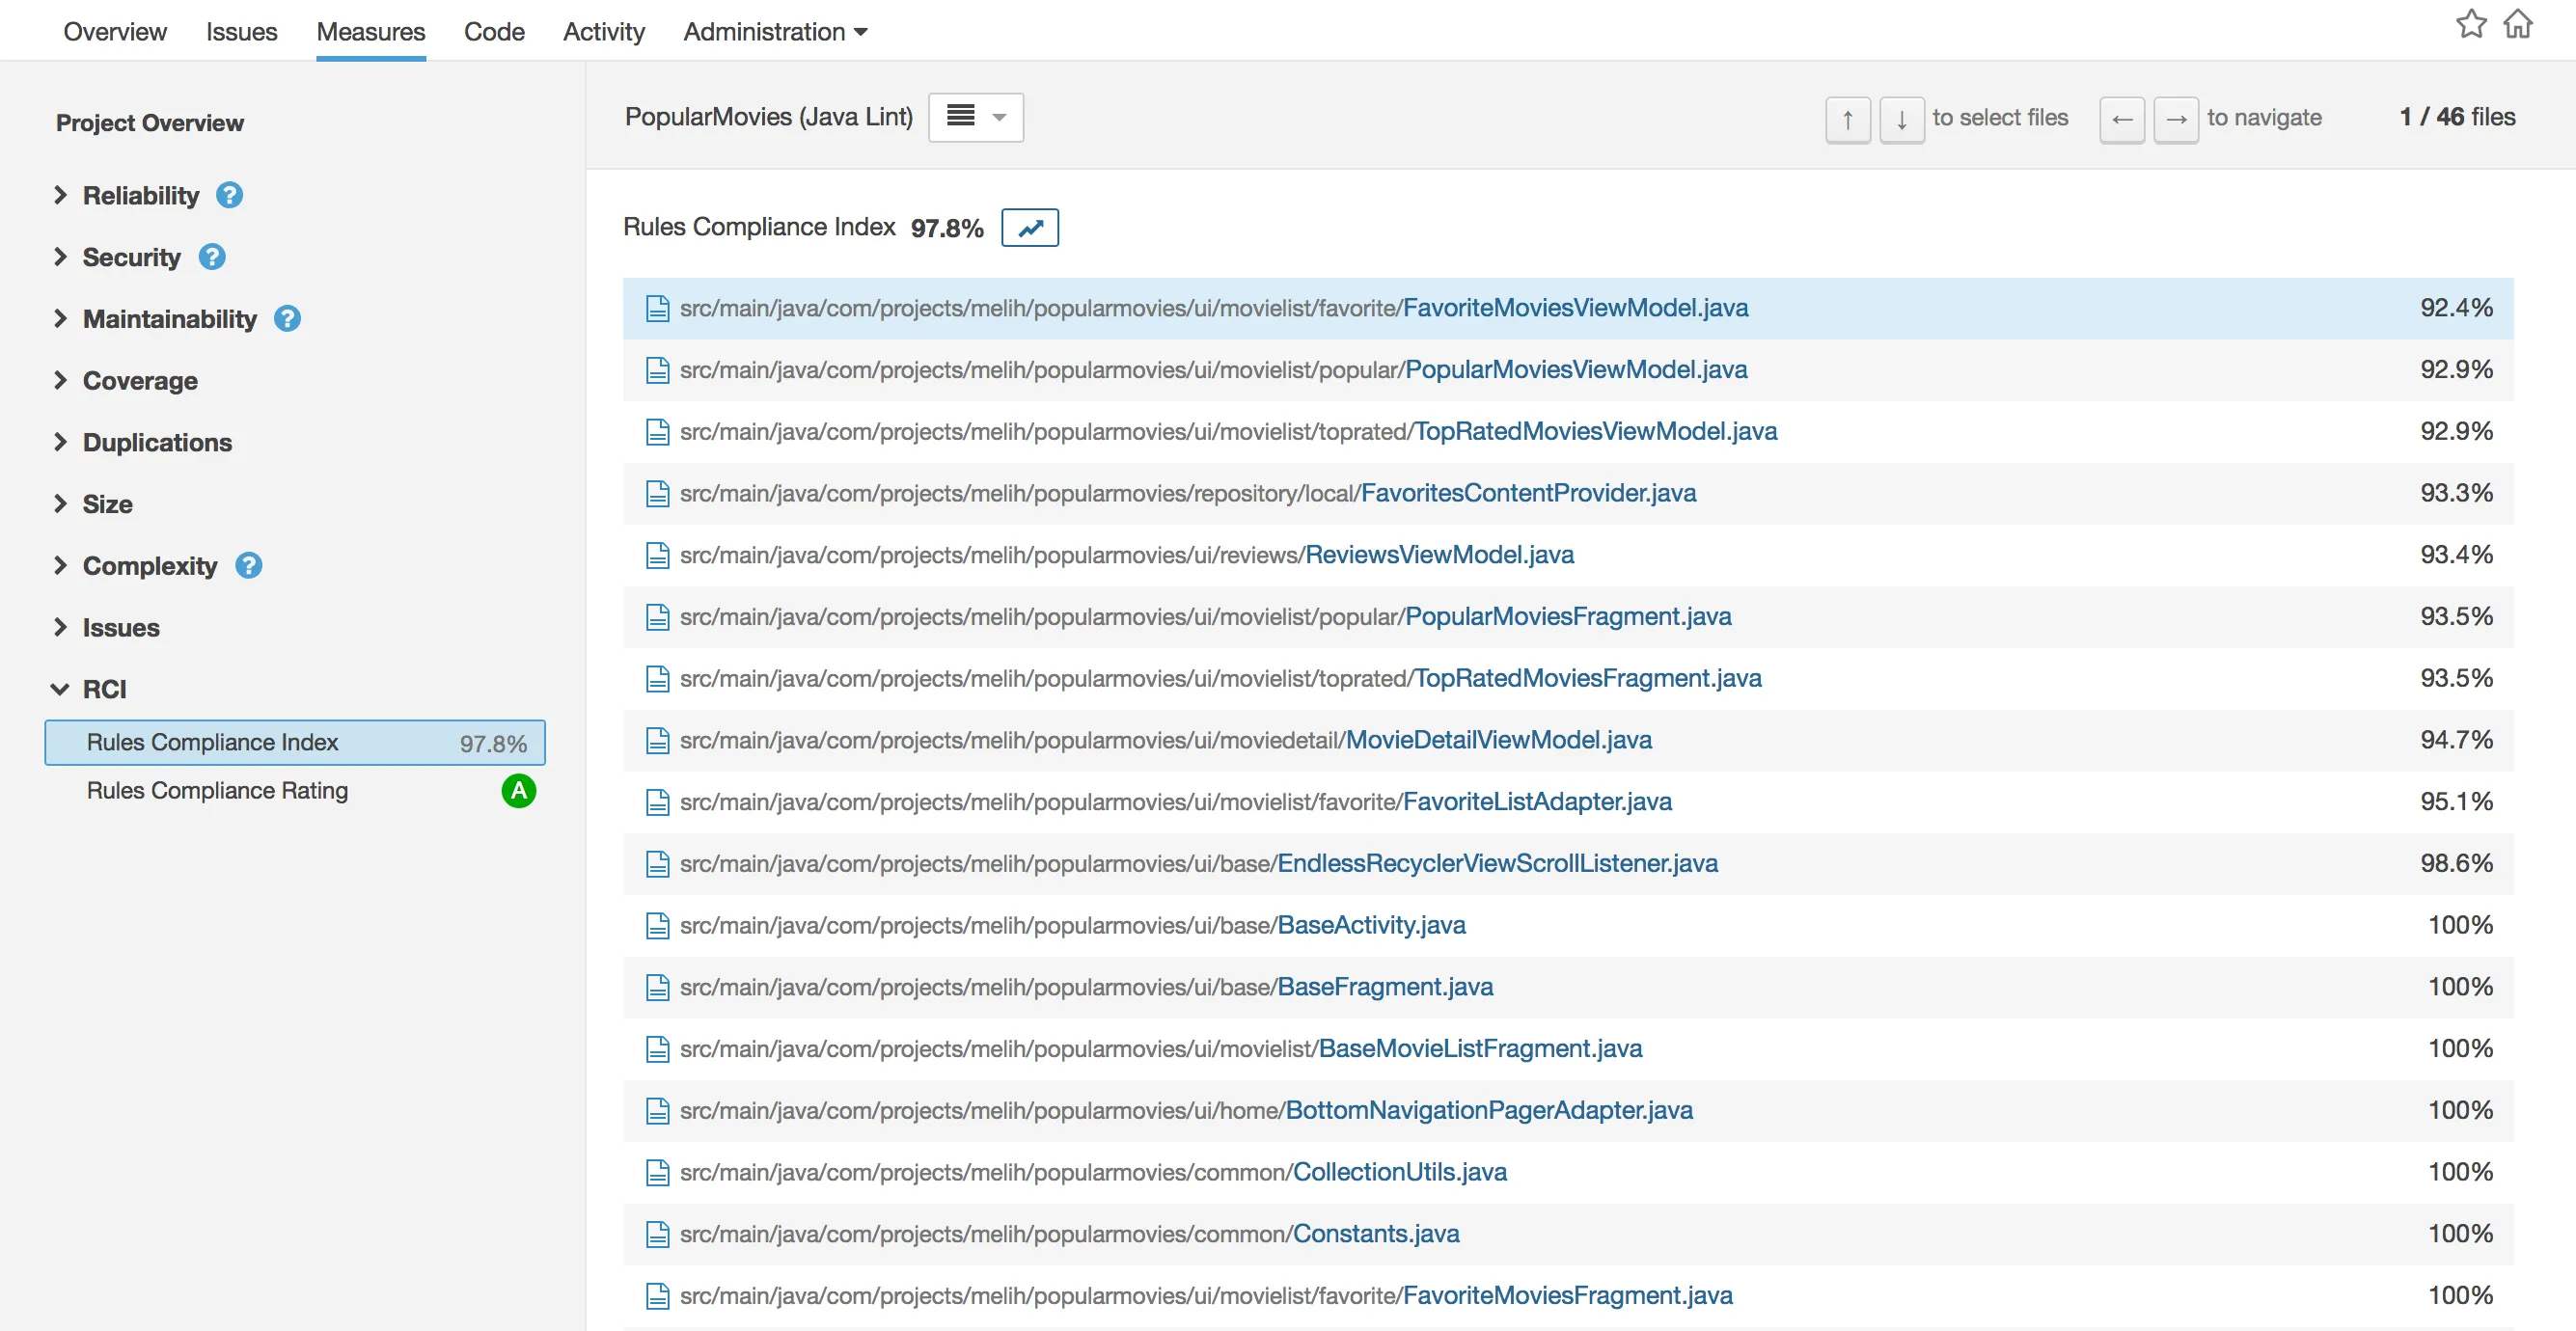
And even RCI: :))

There is more coming :) I’m sure if you are analyzing your code every time before sending them to Git origin, you will fell knackered at last. In below part, I will try to save you from this feeling and tell a bit about SonarLint Plugin on Android Studio and how to use it.
Binding SonarQube server by using SonarLint plugin
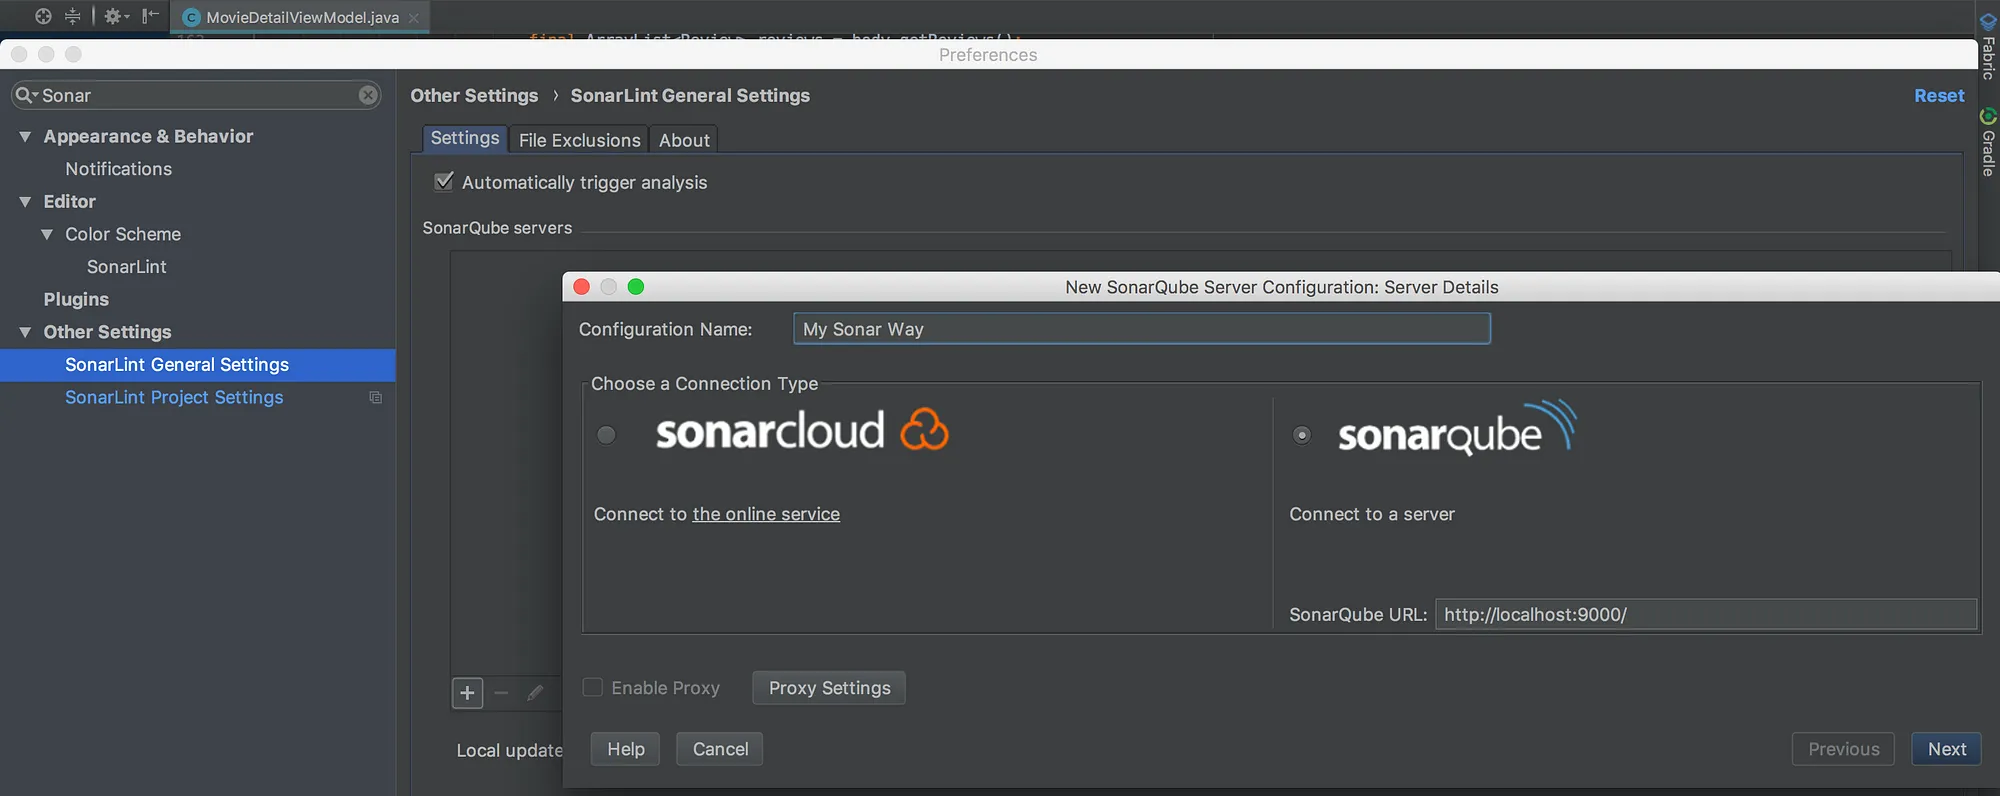
There is a cool plugin for SonarQube called SonarLint plugin. Let’s download it and give it a go. After update you can go to “Android Studio>Preferences>Other Settings>SonarLint General Settings” and add a new SonarQube server which in my case http://localhost:9000/ as shown below:

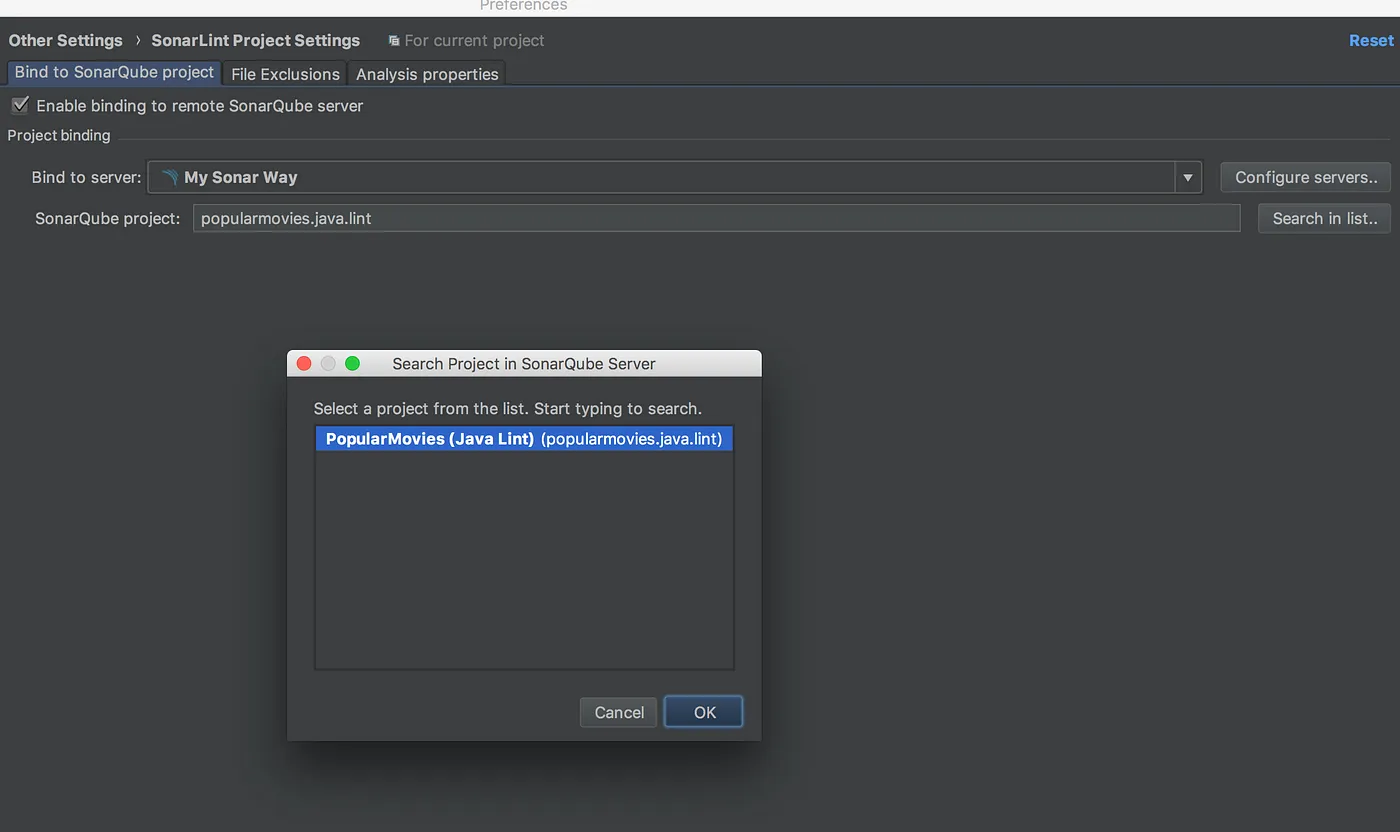
Next button will take us to Token page and at there we need token which we can take from http://localhost:9000/account/security by clicking “Create Token”. After entering token now we have successfully declared our SonarQube server. Only one thing remained, binding it! 🎊
Make sure you’ve updated the sonar features in SonarQube’s marketplace(SonarJava, FindBugs, etc.). Because SonarLint may require new plugins to bind remote server.


As we can see from the images left, it is easy peasy lemon squeezy :) We choose the server we created and our project in the list. Now after closing settings page by clicking OK, we are ready to run SonarQube via the custom quality profile we created just by selecting “SonarLint” tab and clicking green Run icon. We will see the result immediately and even the rule explanations. 🎊

Bonus
How will we see changes if we updated our Custom Quality Profile at SonarQube server? For example, we decided to remove “@Override” should be used on overriding and implementing methods rule (this is just to show an example, I don’t recommend removing this rule ;)), we deactivated it and what’s next?

We only need to go to “Android Studio>Preferences>Other Settings>SonarLint General Settings” again and click “Update Binding”. The result is shown at below:

Yes, hurrah we don’t see this rule again!! 🎊 🎊 🎊
A small note about SonarQube. It only improves our code quality by helping us to write better and clean code and even correcting the mistakes we have escaped mostly, but still we are all alone to think many other things while developing Android apps. Therefore, may the force be with you!! :)

